

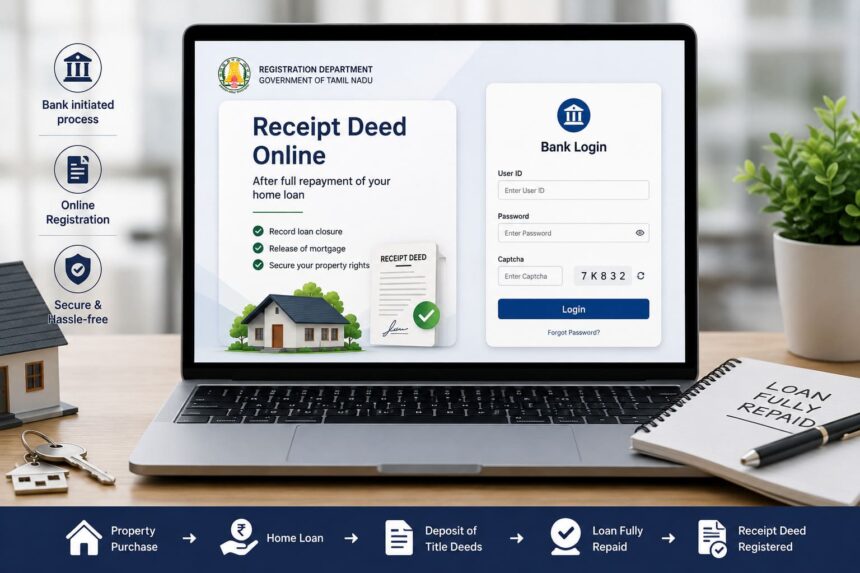
Tamil Nadu’s Anywhere Registration initiative enables selected property transactions through a Presenceless Registration system, reducing the need for in-person visits.
It currently covers the
- **first sale of plots or flats by developers and **
- the deposit of title deeds at the time a home loan is availed, when the property is mortgaged to the bank after purchase and the title deeds are handed over as security for the loan.
When the home loan is fully repaid, the Presenceless Receipt Deed comes into play.
A Receipt Deed records the loan repayment and the lender’s acknowledgment of receipt. The Registration Department’s manual provides a separate workflow for this, accessible only through Bank logins, and includes a Loan Repayment Details section.
In simple terms:
Property Purchase → Home Loan → Deposit of Title Deeds → Loan Repayment → Receipt Deed
.The manual explains how banks can create and submit a Receipt Deed through their login, although the actual availability of this facility may depend on the phased rollout of the Presenceless Registration system.
Step 1: Bank login
According to the manual, the Receipt Deed process starts through a Bank login.
The bank goes to:
Registration → Document Registration → Presenceless Registration
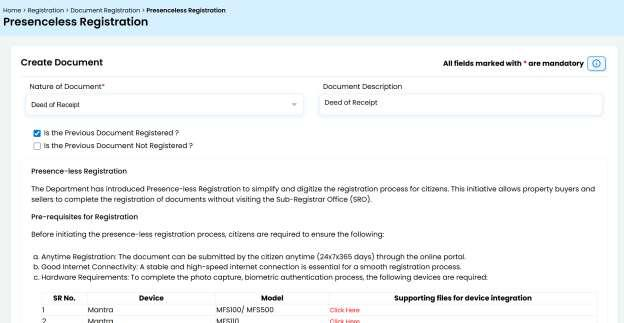
The bank then selects “Deed of Receipt” from the nature-of-deed dropdown.
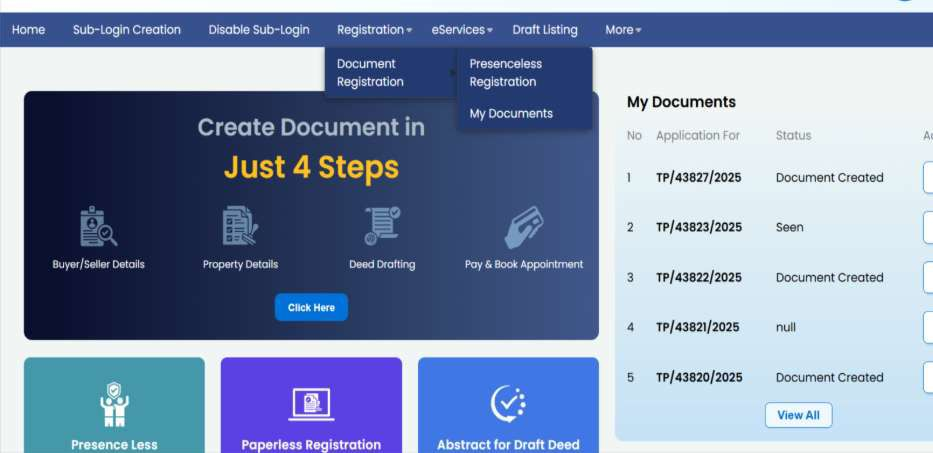
The manual specifically states that the Deed of Receipt is available only through Bank logins.
Step 2: Enter the previous document details
The portal asks whether the previous document has been registered.
The two options are:
- Previous document is registered
- Previous document is not registered
If the previous document has been registered, its details have to be entered.
If it has not been registered, the bank can proceed by selecting Previous Document Not Registered.
This allows the Receipt Deed application to be connected with the earlier document where applicable.
Step 3: Enter the Mortgagee/Purchaser details
The next stage is to enter the Mortgagee/Purchaser details.
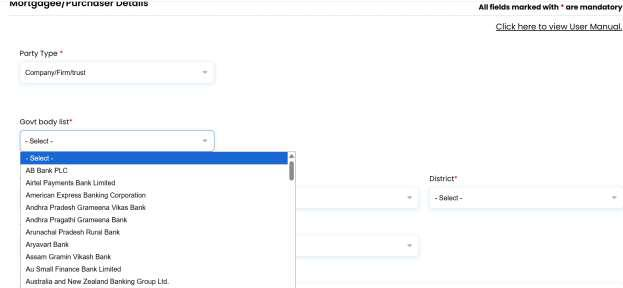
The party type is defaulted to Company/Firm/Trust.
The bank or relevant government body is selected from the dropdown, after which the required:
- Address details
- Contact details
are entered.
Click Add to place the party in the details grid.
Step 4: Enter the borrower or Mortgagor/Vendor details
The bank then enters the Mortgagor/Vendor details.
For an individual, the portal requires:
- Personal details
- Address details
- Contact details
For a company, firm, trust or government entity, the relevant organisational details are entered. The manual specifically mentions the name and TAN number, along with address and contact details.
Aadhaar requirement
The manual states that Aadhaar is mandatory as ID proof for all applicable parties.
After entering the details, click Add to add the party to the grid.
Step 5: Add a representative if required
If a party is unavailable to execute the document, or is a minor, a representative can be appointed.
The available representation options depend on the type of party.
For individuals, the options include:
- Special Power Agent
- Court-appointed Curator
- Liquidator
- General Power Agent
For government entities:
- Special Power Agent
- General Power Agent
- Government Representative
For companies or firms:
- Special Power Agent
- Company Representative
- Liquidator
Step 6: Add witnesses and select the presenter
The manual requires two execution witnesses, with Aadhaar used as their ID proof.
The system also displays an option for a consenting witness.
The claimant is the presenter by default, although another eligible party can be selected from the dropdown.
Step 7: Add the property
The next stage is to enter the property connected with the Receipt Deed.
The user selects the property type and clicks Add.
The manual lists property types such as:
- Plot with Building/Individual House
- Plot
- Flats
- Agricultural Land
- Agricultural Land with Building
- Pathway
- Easement Rights
- Special Kind of Buildings
Step 8: Enter property and title details
The bank then selects the property’s relevant:
- Sub-Registrar Office
- Registration Village
The Patta Number or Title Number must also be entered.
More than one Patta Number or other title number can be added.
The manual states that a Previous Document, Patta Number or Title Number is mandatory.
Step 9: Enter survey details
The next stage is the Survey Details section.
The bank selects:
- Unit of measurement
- Natham or Rural
- Single or Linked Survey
- Survey Number
- Subdivision
- Street Name
According to the manual, the survey number is populated based on the Natham or Rural selection, and the subdivision is populated after the survey number is selected.
The bank then enters:
- Total extent
- Receipt extent
- Market value of Receipt extent
The survey details are then added to the grid.
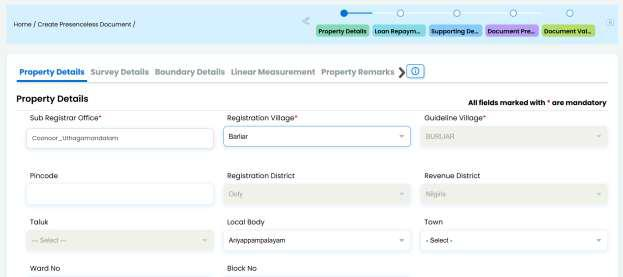
Step 10: Enter the property boundaries and measurements
The next stage is to enter the boundary details.
The portal provides options for:
- Regular Boundary
- Irregular Boundary
The relevant descriptions for the North, South, East and West boundaries are entered.
The user also enters:
- Linear measurements
- Property remarks
- Property items
Step 11: Enter the loan repayment details
This is the part that directly connects the Receipt Deed with the loan-closure stage.
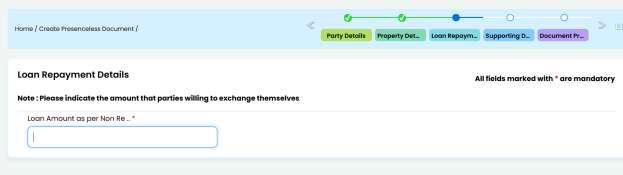
The portal has a separate Loan Repayment Details section.
It specifically asks for the “Loan Amount as per Non-Registered Document.”
The manual also carries a note regarding the amount that the parties are willing to exchange between themselves.
Thus, unlike the initial property sale or creation of the loan security, this stage deals with the repayment-related details associated with the Receipt Deed.
Step 12: Enter supporting details
The bank then enters the Place of Execution details and selects the relevant Sub-Registrar Office.
The application then moves to document preview and valuation.
Step 13: Check the document and registration charges
Before creating the document, the portal provides a Document Preview so that the information entered can be checked.
The Document Valuation section allows the user to verify:
- Stamp duty
- Registration fee
- Computer fee
- DW fee
This provides an opportunity to check the details and charges before the document is created.
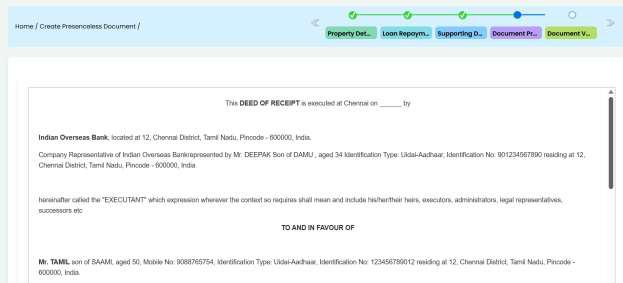
Step 14: Create the document and generate the TP number
After checking the information, click Create Document.
The system generates a TP number for the document.
The Receipt Deed can then be accessed through My Documents for the next stages.
Step 15: Capture photo and biometric details
From My Documents, select the Receipt Deed and click Photo Biometric Capture.
The system is used to capture the photo and fingerprint of the applicable parties.
Step 16: Complete Aadhaar validation
Aadhaar validation has to be completed for the listed persons.
The process involves:
- Click Capture Photo.
- Capture the photo.
- Submit the photo.
- Click Capture Biometric.
- Capture the fingerprint.
- Click Validate Biometric with Aadhaar.
After successful validation, the system displays “Validated successfully.”
Step 17: Upload the supporting documents
Once photo and fingerprint capture has been completed for all applicable parties, the Pay option becomes available.
However, the manual states that the required documents must be uploaded before payment. Otherwise, the system displays an alert.
The documents include:
- Identification proofs of the parties
- Property image
- Reference documents, where required
Step 18: Print the document
After completing the document upload and biometric capture, click Print.
The sequence is important because the system requires the document to be printed before payment.
If the user clicks Pay before printing, the portal displays an alert asking the user to print the document first.
Step 19: Make the online payment
After the document has been printed, the bank can click Pay and complete the online payment.
Once payment is completed, the file is submitted successfully to the back office.
What does this mean for a borrower who has repaid the home loan?
The Receipt Deed process described in the manual represents the loan-repayment side of the property registration journey.
The broad sequence is:
First Sale → Home Loan → Deposit of Title Deeds → Full Repayment of Loan → Receipt Deed
The Receipt Deed is therefore different from the documents involved when the property is originally purchased or when the loan security is initially created.
The manual’s inclusion of a specific Loan Repayment Details section supports its connection with the loan-closure stage.
What happens after payment?
According to the manual, after online payment the file is submitted to the back office.
The manual does not provide a separate numbered step explaining the subsequent download of the finally registered Receipt Deed.
Therefore, the article should not state that the registered Receipt Deed can definitely be downloaded online based solely on this manual.
Presenceless Receipt Deed: Process in brief
The complete workflow described in the manual can be summarised as:
Bank Login → Deed of Receipt → Previous Document → Mortgagee/Purchaser → Mortgagor/Vendor → Representatives → Witnesses & Presenter → Property → Survey Details → Boundaries → Loan Repayment Details → Supporting Details → Preview & Valuation → Create Document → TP Number → Photo & Biometric Capture → Aadhaar Validation → Document Upload → Print → Online Payment → Back-Office Submission
Conclusion
Tamil Nadu’s Anywhere Registration initiative is being introduced to simplify selected property registration transactions through a presenceless system. While the initial rollout focuses on the transactions that have been enabled by the Registration Department, the Department has also published a separate Presenceless Receipt Deed manual for the loan-repayment stage.
The Receipt Deed comes into the picture after the property loan has been repaid, rather than at the time the original property purchase or loan is created. The manual outlines a bank-led process covering borrower and property details, loan repayment information, Aadhaar-based biometric verification, document upload, printing, and online payment. However, since the system is being rolled out in phases, the publication of the manual does not mean the facility is currently live; it only explains how the process will work once enabled.
In simple terms: repaying a home loan ends the debt, but the formal discharge documentation is a separate step. The Presenceless Receipt Deed is the online process for completing that step through the bank’s login.
VRE Assistance in Obtaining a Presenceless Receipt Deed
Verified.RealEstate streamlines the process of securing a Presenceless Receipt Deed after full loan repayment by guiding homeowners through legal and administrative requirements. With expertise in property documentation and lender coordination, VRE ensures accurate completion of all steps, including loan closure verification, liaison with financial institutions, and document preparation and submission—making the process smooth and hassle-free for property owners.