



Tamil Nadu’s Presenceless Sale Deed facility allows eligible property transactions to be completed online through the Registration Department’s portal. Buyers, sellers and witnesses can submit details, upload records, complete Aadhaar-based identity verification, pay the charges and download the registered document online.
However, this facility is not available for every property sale.
Who Can Use the Presenceless Sale Deed Facility?
Presenceless registration is enabled for:
- The first sale of a plot by a builder or promoter
- The first sale of a flat or apartment by a builder or promoter
- A sale deed executed by the Government
The portal describes a “First Sale” as a property purchased directly from a builder or promoter.
If the Government is the only seller or executant, other property types may also be permitted. If a government body is included along with a private individual, company, firm or trust, the transaction remains restricted to a first-sale plot or flat.
Official manual screen showing the property restrictions and government exemption.
How to Register a Sale Deed Online
Step 1: Log in to the Registration Portal
Sign in using your username, password and captcha. Then go to:
Registration → Document Registration → Presenceless Registration
Select “Sale Deed”, read the prerequisites and click “Proceed.”

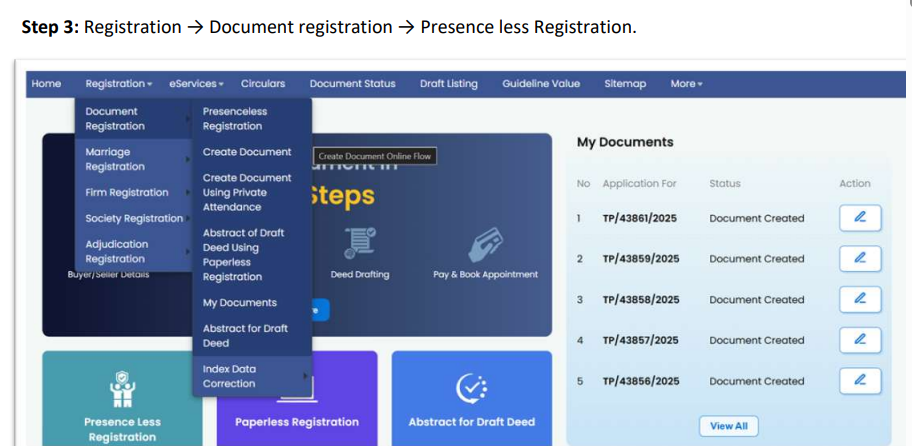
Official manual screen showing how to select Presenceless Registration and Sale Deed.
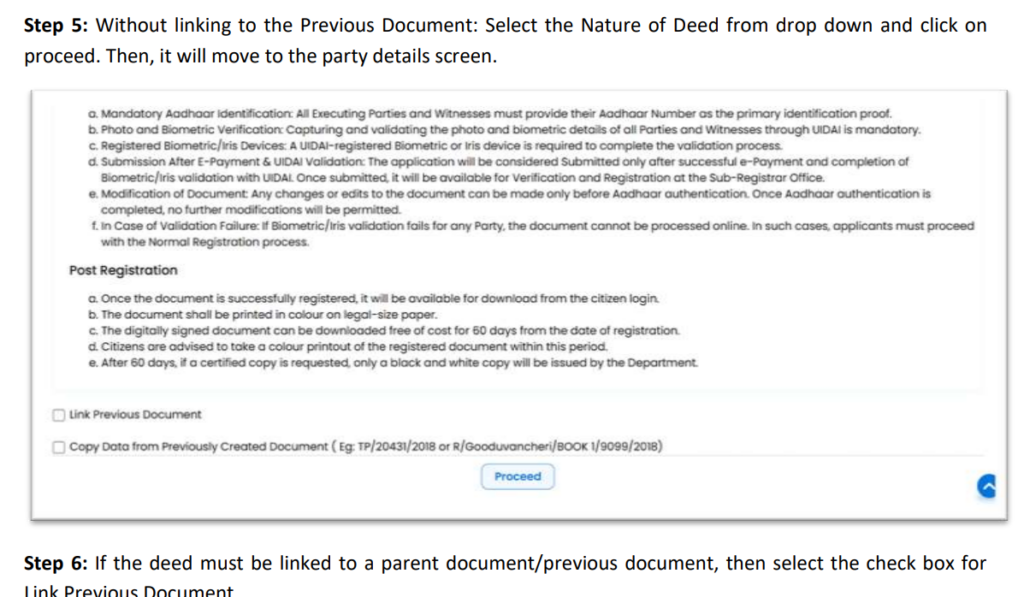
Step 2: Link the Previous or Parent Document
You can continue with or without linking the previous document.
To link it, enter:
- Sub-Registrar Office
- Book number
- Document number
- Registration year
- Document type
If the record is already digitised, the portal will automatically fetch the party and property details. If not, you will need to enter the details manually.

Step 3: Add the Seller
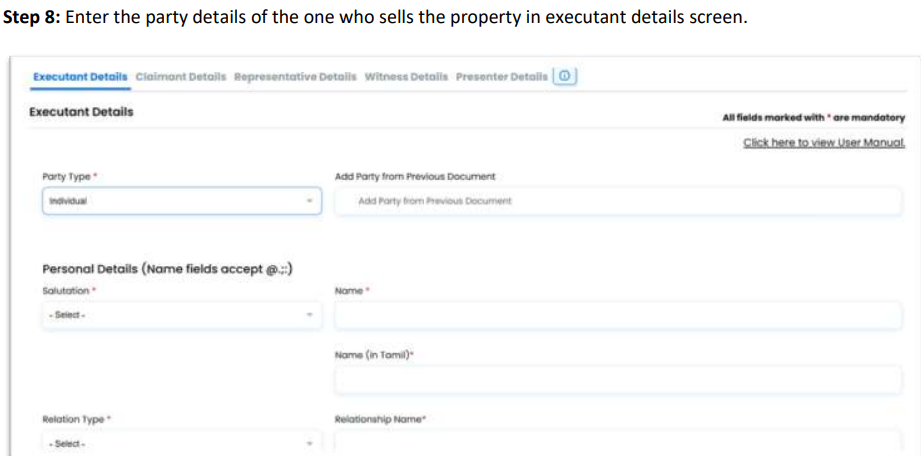
Enter the seller under “Executant Details.” The seller may be:
- An individual
- A company, firm or trust
- A government organisation
For an individual, enter Aadhaar and the required personal, address and contact information.
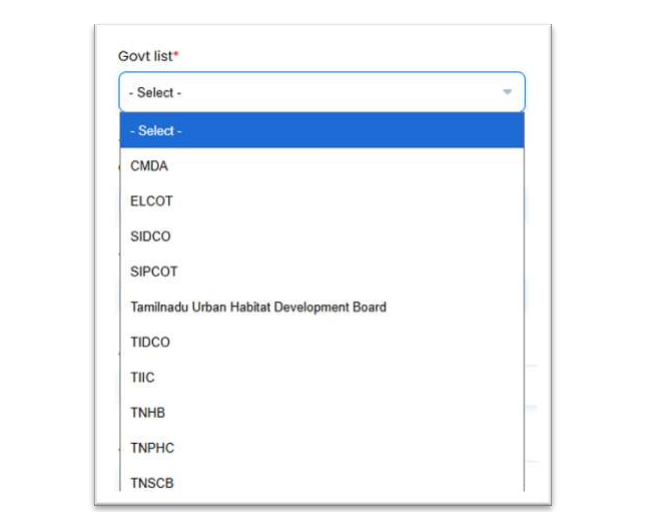
For a company, firm or trust, enter the entity name, TAN, address and contact details. For a government party, select the organisation from the portal’s dropdown list.
Multiple sellers may be added. Click “Save” to create the draft. The same draft number will continue until the document index is created.

If the seller is a government organisation, select “Government” as the party type. Choose the name of the government organisation from the dropdown list, enter its address and contact details, and click “Add.”

Step 4: Add the Buyer
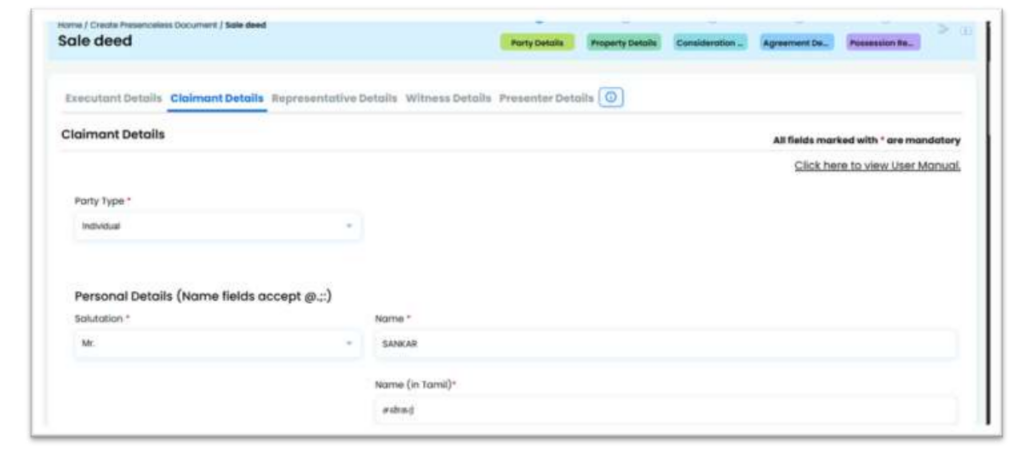
Enter the buyer under “Claimant Details.” The buyer can also be an individual, company, firm, trust or government organisation.
Provide the applicable identification, address, entity and contact details.

Step 5: Add Representatives, If Required
A representative can act for an unavailable party, minor, company or government organisation.
Depending on the party type, the portal provides options such as:
- Special Power Agent
- General Power Agent
- Company Representative
- Government Representative
- Court-Appointed Curator
- Liquidator
- If selected party is Individual, select representation by as Special power Agent or Court appointment curator or Liquidator or General Power Agent.
- If selected party is Government, select representation by as Special power Agent or General power Agent or Government Representative.
- If selected party is Company/Firm, select representation by as Special power Agent power Agent or Company Representative or Liquidator
Enter the representative’s name, relationship, identity proof, address and contact details.
Step 6: Add Two Witnesses
Add two execution and identification witnesses using Aadhaar.
The witnesses must provide consent for Aadhaar-based identity verification. The portal may obtain their name, date of birth, mobile number, address and fingerprint or iris information for authentication.
The manual states that biometric information will not be stored or shared and will be transmitted to CIDR only for authentication.
The buyer is selected as the presenter by default, but another eligible party may be chosen.
Step 7: Enter the Property Details
If a parent document has been linked, select “Copy Property from Linked Document” and click “Copy.” Otherwise, choose the property type and enter the details manually.
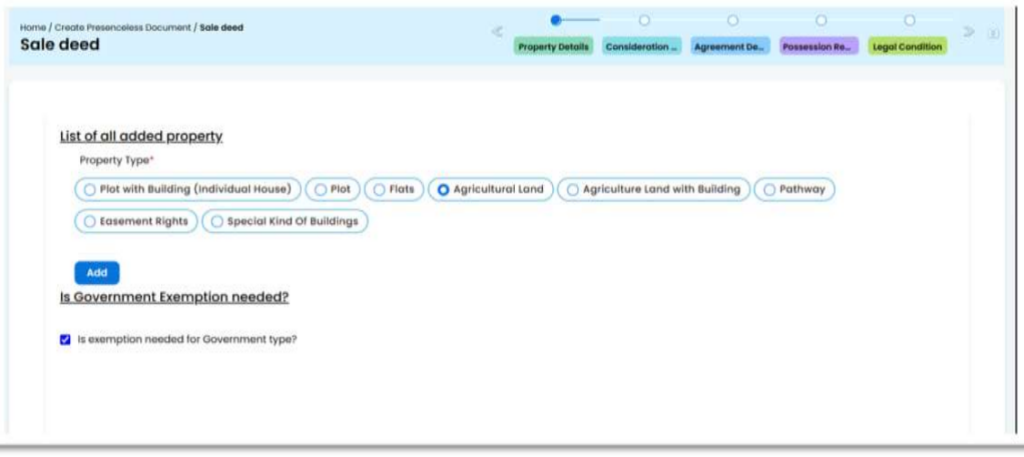
- If Executant added is Individual or Company/trust/firm party Type, Only Plot/ Flat (First Sale) property alone will be listed in property Type.
- If the Executant has another Party Type added along with Government Party Type, then System will restrict from creating Presence less Registration for Property type other than Plot/ Flat (First Sale).
- If Executant added is Government party Type, the system will allow to create Sale Deed document in Presence-Less registration method for any property type.
- Government exemption is applicable only for government party type as Executant.
Select the correct SRO and registration village. Enter details including:
- Guideline village
- Registration and revenue districts
- Taluk and local body
- Ward and block numbers
- Town survey or subdivision
- Patta or other title number
- Survey number and subdivision
- Street and old survey number
- Total and conveyed extent
- Market value
A previous document, Patta number or another title number is compulsory.
If the property includes an Undivided Share, provide the UDS type, ratio or exact value.

Step 8: Add Layout, Plot and Boundary Information
Enter the layout approval name, approval type, approval number and plot number. More than one plot number can be added when required.
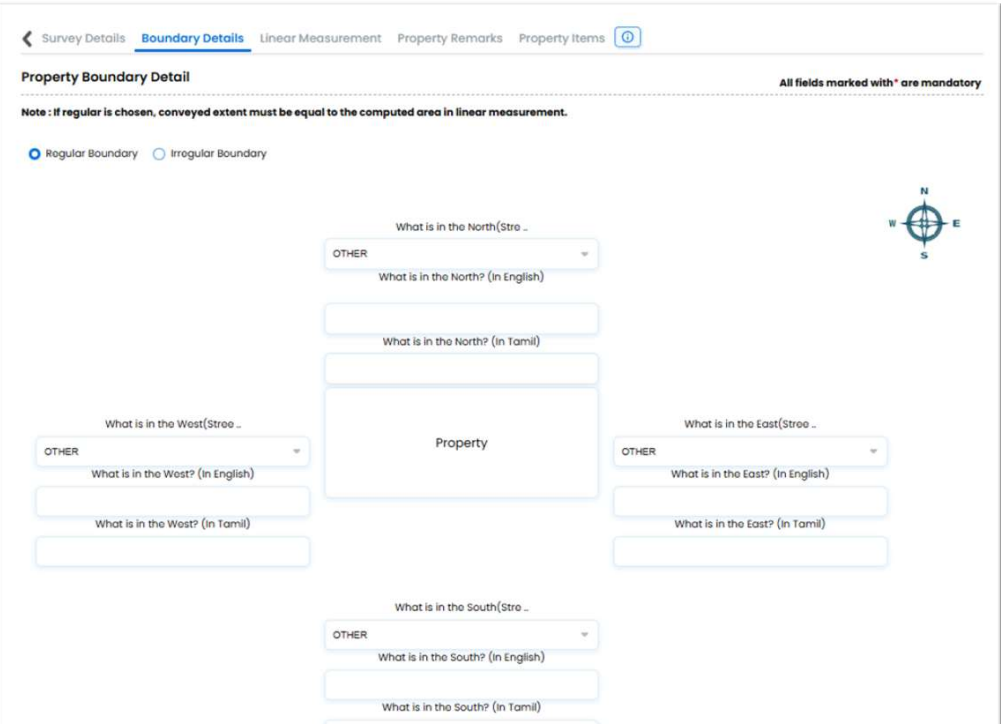
Choose whether the boundary is regular or irregular.
For a regular boundary, the conveyed extent must match the area calculated from the linear measurements. Enter the north, south, east and west boundary descriptions and the required measurements.

Optional property components can also be included, such as:
- Trees
- Well or borewell
- Tank
- Electric motor pump set
- Pathway or fishing rights
- Machinery
- Other property items
Additional properties may be included in the same sale deed.
Step 9: Enter the Sale Consideration
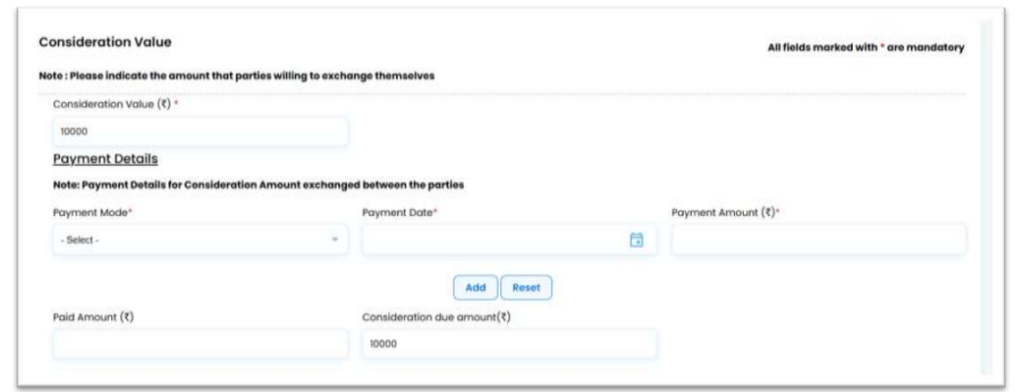
Enter the total consideration value and provide:
- Payment mode
- Payment date
- Payment amount
- Amount already paid
- Balance consideration due
Click “Save and Continue.”
If applicable, link a Construction Agreement Deed or Sale Agreement Deed.

Step 10: Review the Sale-Deed Clauses
Possession remarks, legal conditions and the reason for sale are prefilled by the portal but can be edited.
The standard clauses generally cover:
- The seller’s ownership and authority to sell
- Absence of encumbrances, attachments, claims and litigation
- The buyer’s right to peaceful possession
- Absence of government or local-body tax arrears
- Seller’s indemnity
- Compliance with applicable law
- Execution of further records required for title transfer and mutation
For a property containing a building, TANGEDCO, Metro Water and property-tax details may be added. Uploading supporting records in this section is described as optional.
Enter the place of execution and select the SRO.
Check the Patta details carefully. Once title information is received from the Registration Department’s back office, Patta details cannot be added or changed.
Step 11: Preview the Document and Charges
Verify the complete document preview, including:
- Seller, buyer and witness details
- Property and survey information
- Market value entered by the parties
- Market value calculated by the system
- Stamp duty
- Registration fee
- Computer fee
- DW fee
The portal’s calculated value may change based on the document recitals and previous property records.
When everything is correct, click “Create Document.” A TP number will be generated. Download the draft PDF and verify it carefully.
Step 12: Upload the Required Documents
Go to “My Documents,” select the sale deed and click “Upload Documents.”
The displayed upload categories include:
- Identification proof
- Plot layout map
- Property image
- Reference document
Each attachment may be up to 50 MB. The displayed permitted formats include PDF, JPEG/JPG, PNG, GIF, TIFF/TIF, XLS and XLSX.
Save the uploaded records. The portal should display “Your Document Submitted Successfully.”

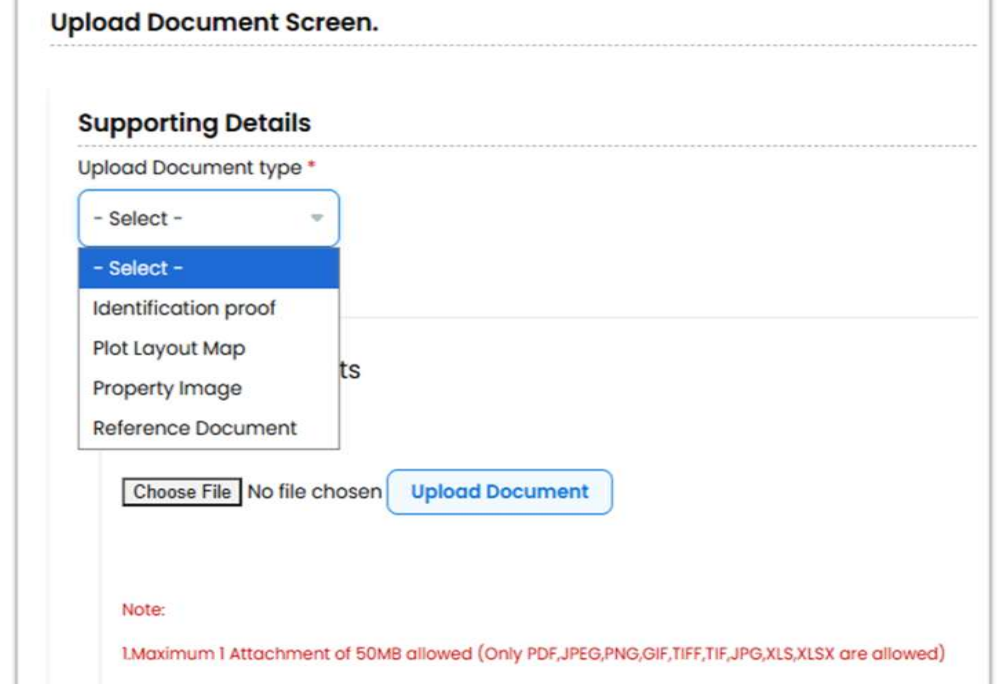
Official manual screen showing the attachment categories, formats and 50 MB limit.
Step 13: Complete Photo and Aadhaar Biometric Verification
Select “Photo Biometric Capture.”
For every applicable party:
- Complete Aadhaar validation.
- Capture and submit the photograph.
- Select “Capture Biometric and Aadhaar Validation.”
- Capture the biometric information.
- Validate it against Aadhaar.
Successful authentication will display “Validated Successfully.”

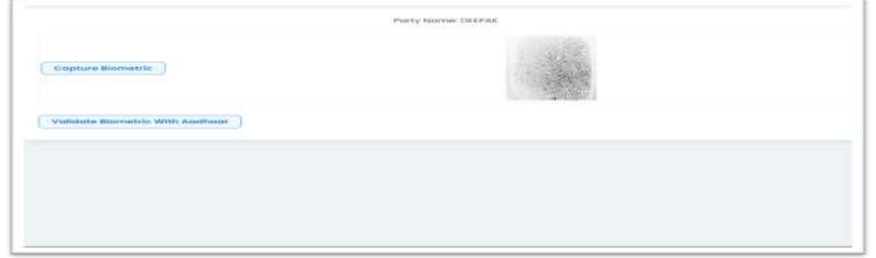
Official manual screen showing party-wise photo capture before biometric validation.
Step 14: Print Before Making Payment
After completing the uploads and biometric verification, print the document.
The portal specifically warns applicants to print the document before payment.
Check whether the generated PDF contains:
- All entered information
- Every uploaded supporting record
- Details of all Aadhaar-validated parties
Step 15: Pay and Submit the Sale Deed
Click “Pay,” select the applicant type and complete the online payment.

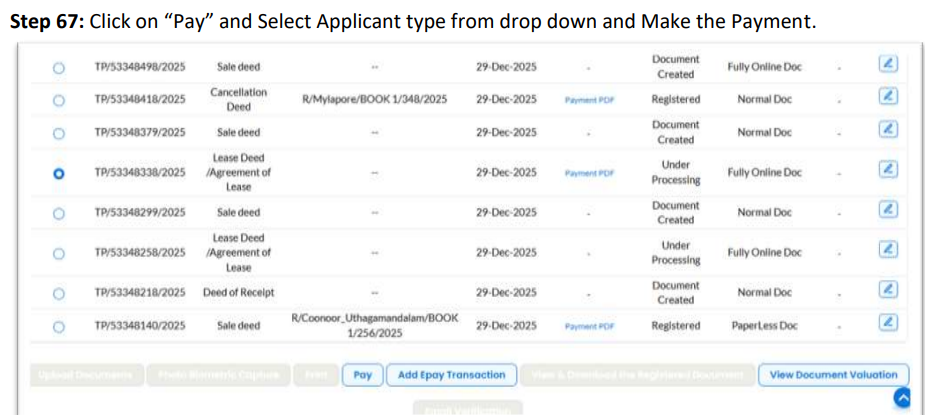
After payment:
- The status changes to “Submitted Online”
- The TP document becomes non-editable
- No further correction or modification is allowed
- The document is sent to the Registration Department’s back office
Therefore, every detail must be checked before making payment.
Step 16: Download the Registered Sale Deed
Monitor the application through “My Documents.” Once the status changes to “Registered,” the digitally registered sale deed can be downloaded through the portal.
Expert Assistance for a Hassle-Free Registration
Online registration still requires accurate title details, Patta and survey information, property measurements, supporting records, Aadhaar verification and correct fee payment.
Verified.RealEstate can assist buyers with document verification, portal data preparation, online registration coordination, banking-related documentation and access to the equipment required for photo and biometric authentication. This can reduce errors and help the buyer complete the transaction smoothly.